
Wanna dive into the underground world, experiencing adventures and mysteries? Many players love to have their own underground survival bases, to make their worlds more attractive. You can build your own underground base and live there, escaping haunted passive and hostile mobs. Underground base is no doubt a best shelter to live in your survival worlds. In this article, we have provided an ultimate guide on Minecraft underground survival base with pictures. Let’s build together!
Ultimate Guide On X- shaped Underground Survival Base
Minecraft download is a game especially for building the most beautiful structures from villages to castles, as it has endless biomes and landscapes to explore. Minecraft players can explore different vast areas and build astonishing structures there. Besides building all other houses, underground bases are the most rated to build in the survival worlds. You can now have your own Minecraft underground survival base as it is quite easy to build.
Underground base is the best shelter to hide from the dangerous mobs and the best area to hide your precious items and other resources. From houses to farms, the underground is the best place to grow, build and live. Get your minds on the complete guide for making a beautiful underground survival base with pictures for clarity. Also check out amazing houses like Minecraft Cozy Nether House.
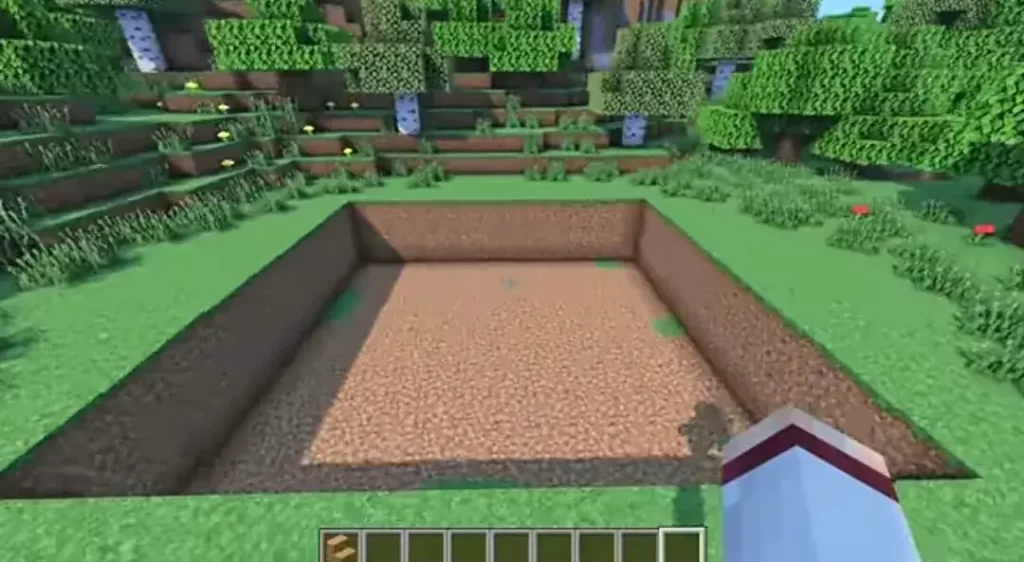
Step 1: Create Foundation
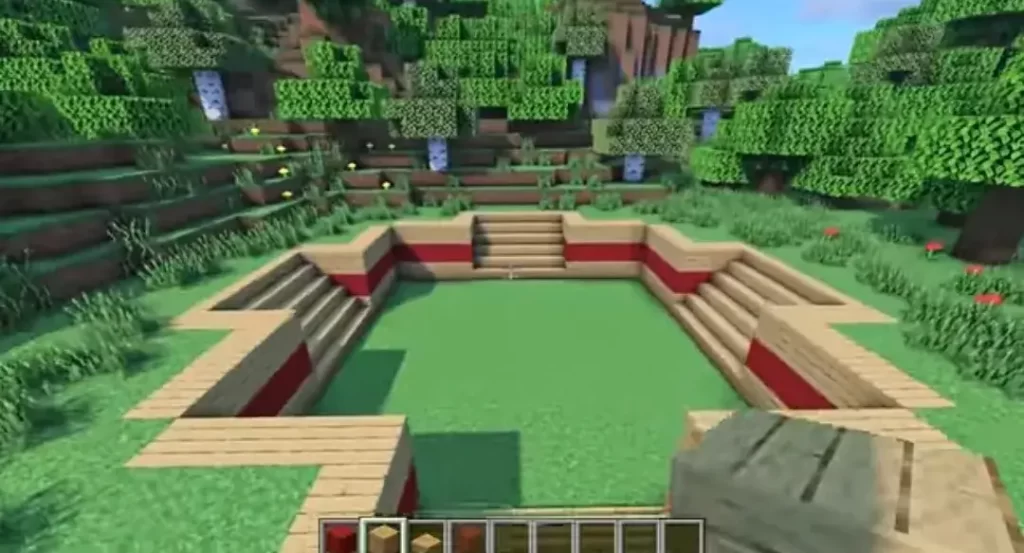
In the first step, build a strong foundation of your underground survival base. Clear an area of the ground as 13×13. The area should be 3 blocks deep.
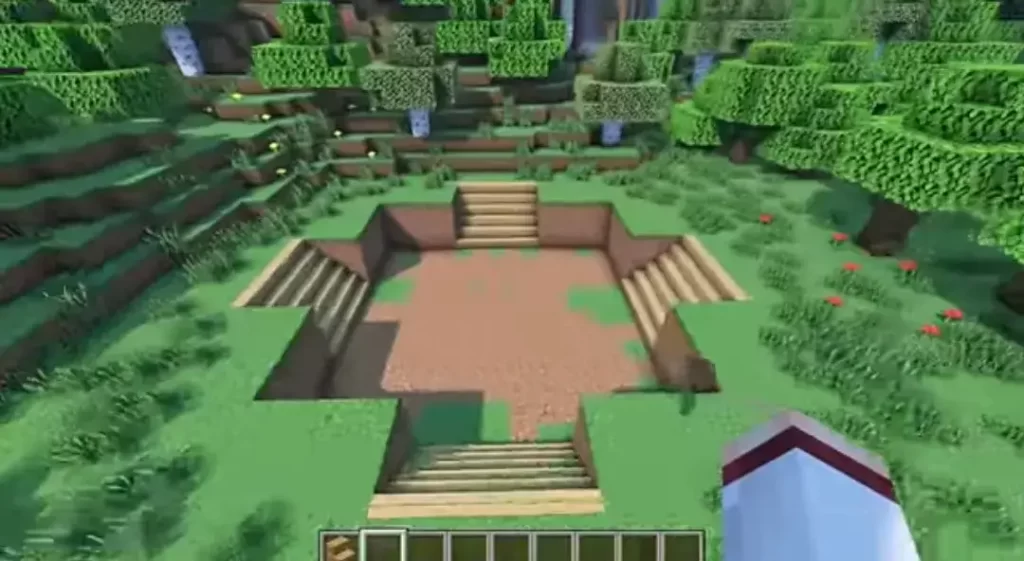
Step 2: Add Staircases
In the second step after building a foundation, you have to add staircases at the middle of each side of your base. Clear 5 wide sections and should be slopes in the upward direction. After that, add Oak stairs filling the space.
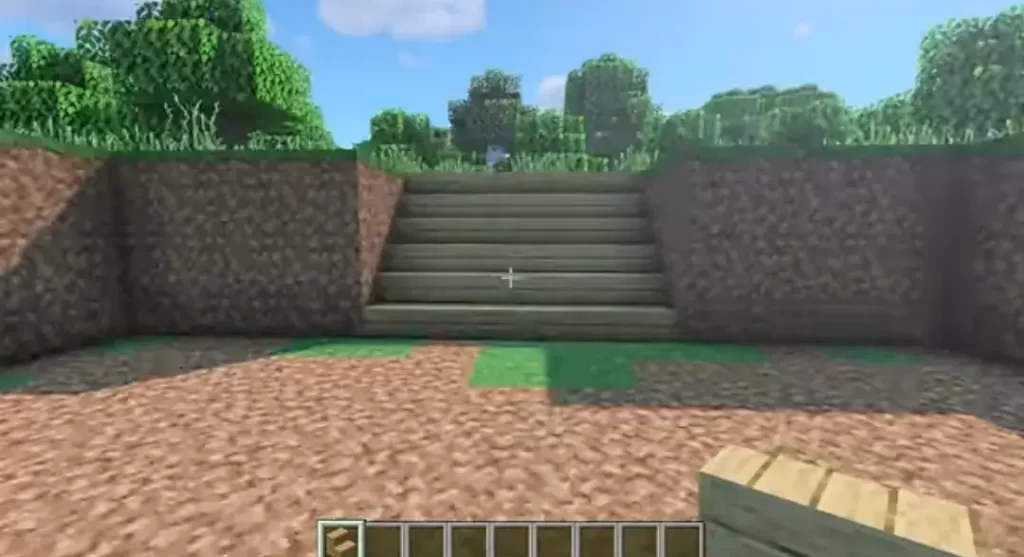
Now, do that on all remaining sides, the same as above.
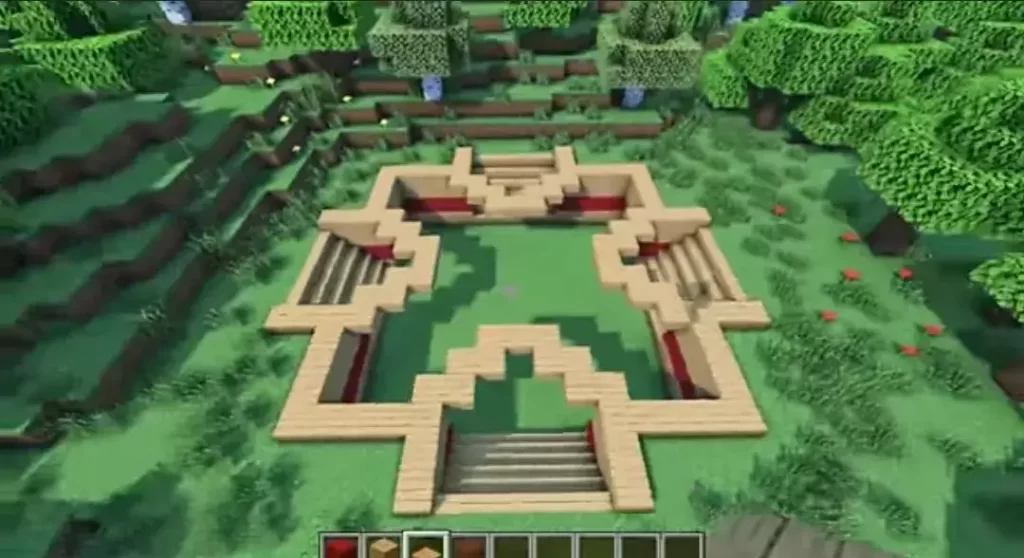
Step 3: Replace Walls
In the third step, you have to replace your dirt walls with Red concrete and Oak planks. Replace middle areas with concrete and other remaining wall areas with oak planks.
Step 4: Make X-Shaped Overtop
Now in this step, place oak slabs above the oak planks on all sides. After that extend oak slabs at the end of each staircase to make X shape.
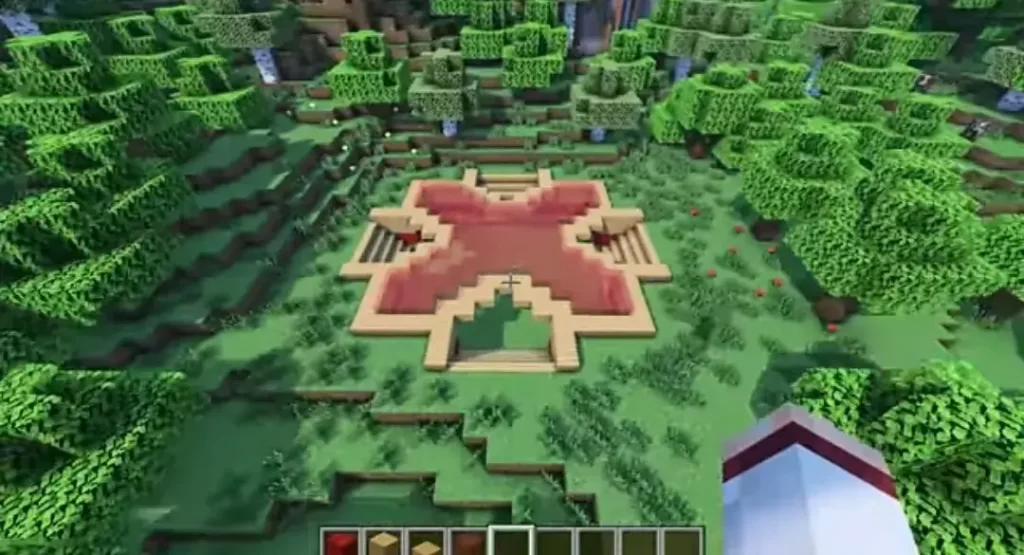
Step 5: Fill X-Shape Top
In this step, you have to fill your X shape top with red stained glass within oak slabs.
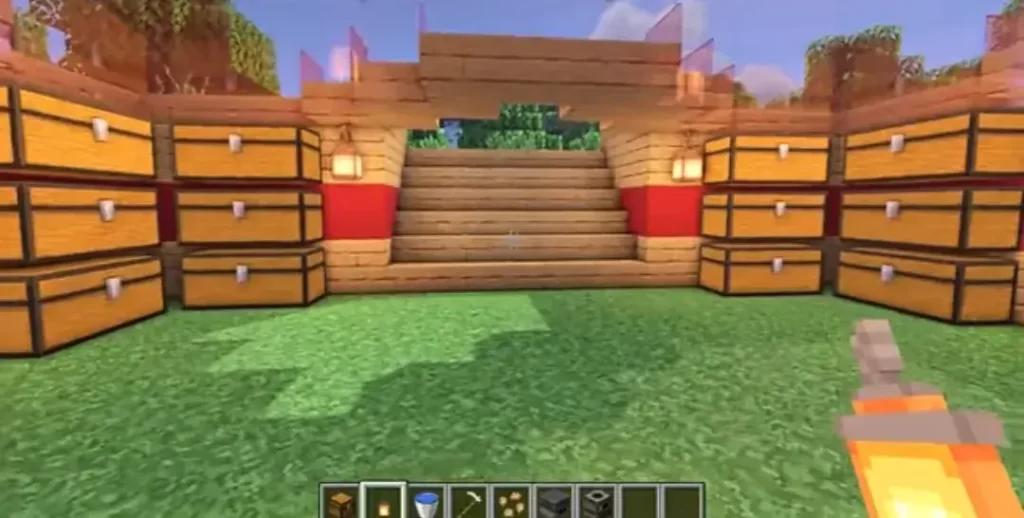
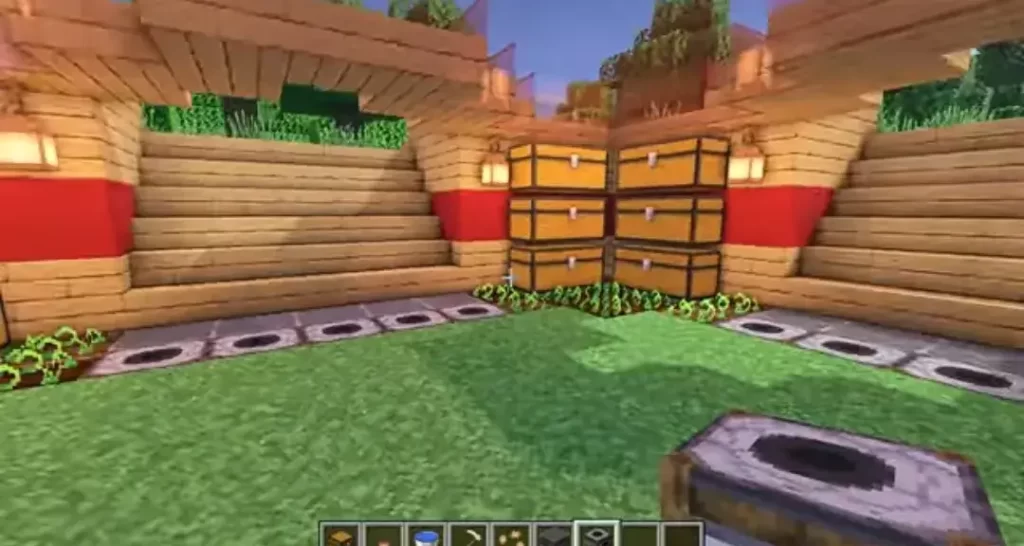
Step 6: Interior Design
After making an exterior of your survival base, let’s work on interior design. Add chests on all sides of the base and add lanterns for lighting.
Step 7: Place Crops
For making your underground base more productive, add some crops at each side. Till the area and place a water source using water buckets. After that, add whatever type of seed you want. At last, add smokers for more attraction.
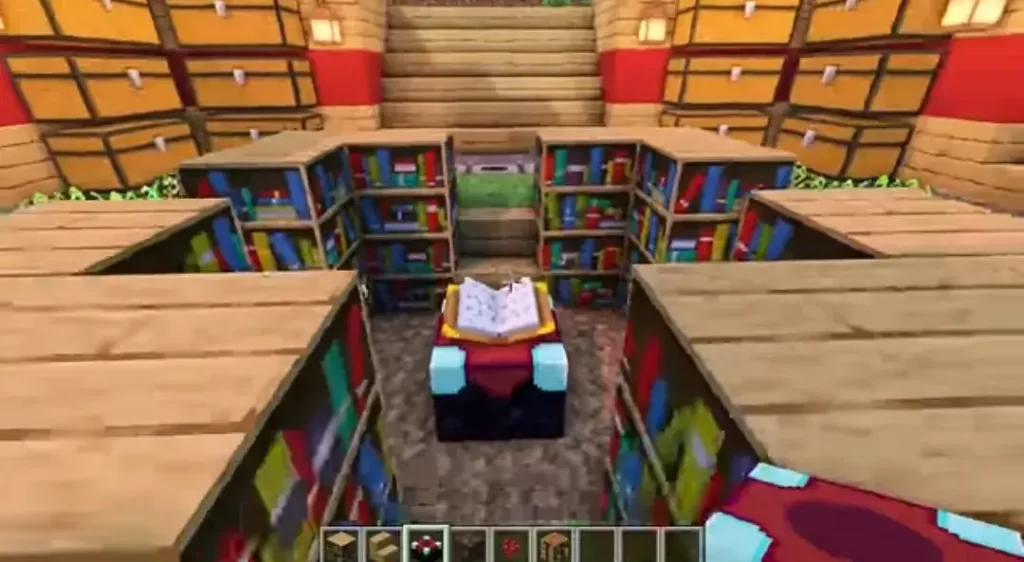
Step 8: Build Enchantment Area
Build an underground enchantment area by digging out a 5×5 area deep. After that add 6 bookshelves and place oak stairs between the bookshelves. After placing oak stairs, add an enchantment table at the center.
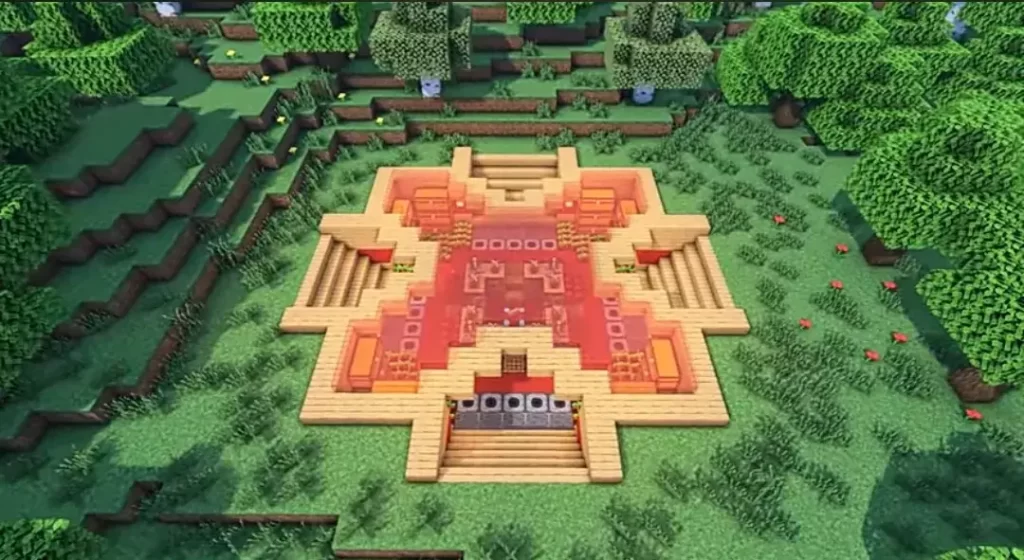
Final Thoughts
As underground bases are too pretty and quite too aesthetic, we recommend you to build this red stained X-shaped underground survival base to build something enhanced. Follow the steps above to build too similar to this one. Moreover, you can add more interior furniture according to your preferences.


