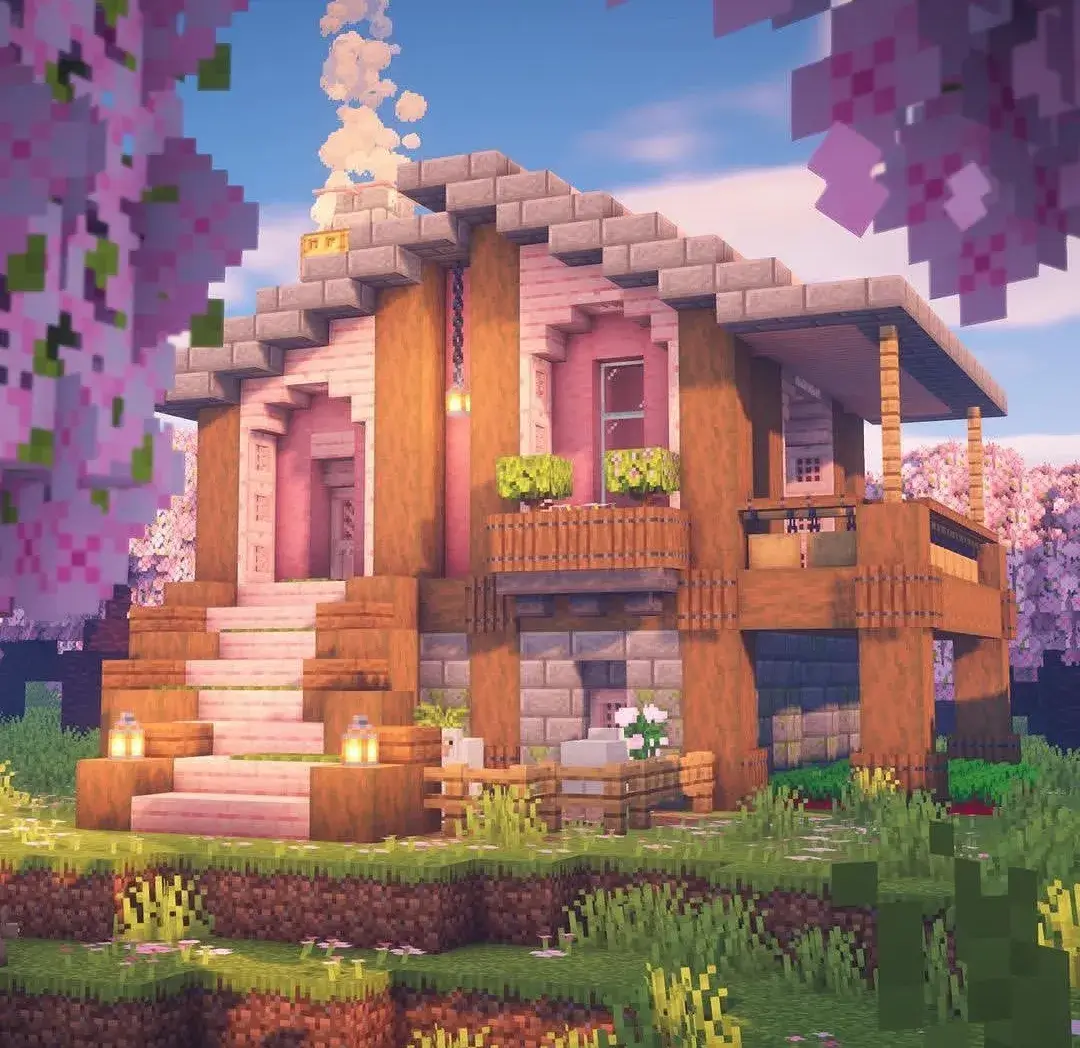
Want to build an aesthetic Starter house in Minecraft? Minecraft Cherry Blossom house is best to build in the cherry grove biome of your Minecraft world. This house is easy to build plus best to start as a beginner in the survival mode of Minecraft. Drive into this article to know the steps of building this new cherry house in Minecraft with pictures.

Ultimate Guide on Building Cherry Blossom House
As a Minecraft player, you should have to try out building the most trending structures and buildings in your survival world as a starter. This will enhance your building skills plus you will get your own aesthetic house having full protection against mobs. The cherry blossom house is something every Minecraft player can build and live in the aesthetic environment of the house.
Build your own starter cherry blossom house using different seeds, materials, resources packs and shaders. Here we’re gonna use BSL Shader 1.20 with Vanilla Tweaks and Jerm’s better leaves resource packs. Also check out more categories and houses of Minecraft.
Step 1: Build Foundation
Build a foundation of your cherry blossom house firstly having dimensions of 14 x10.

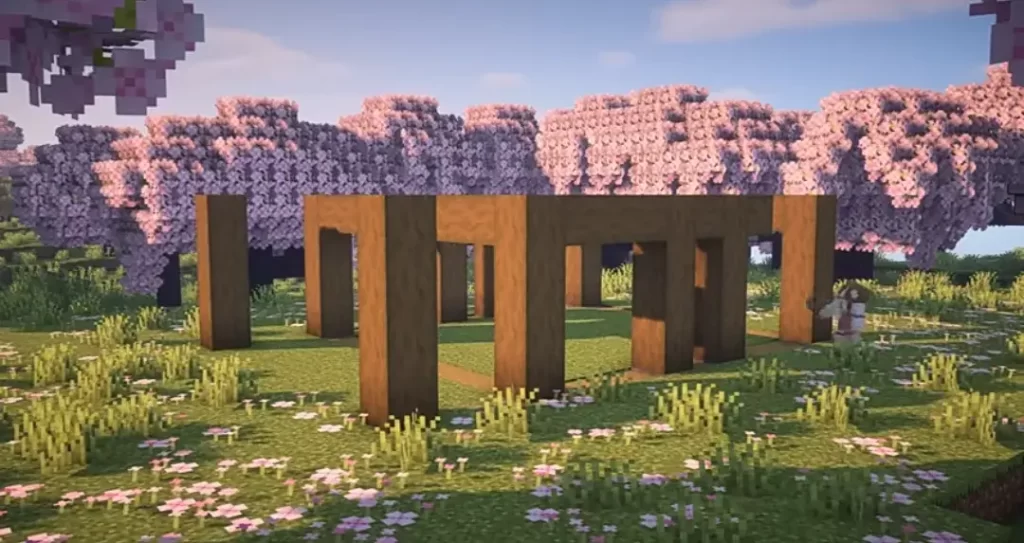
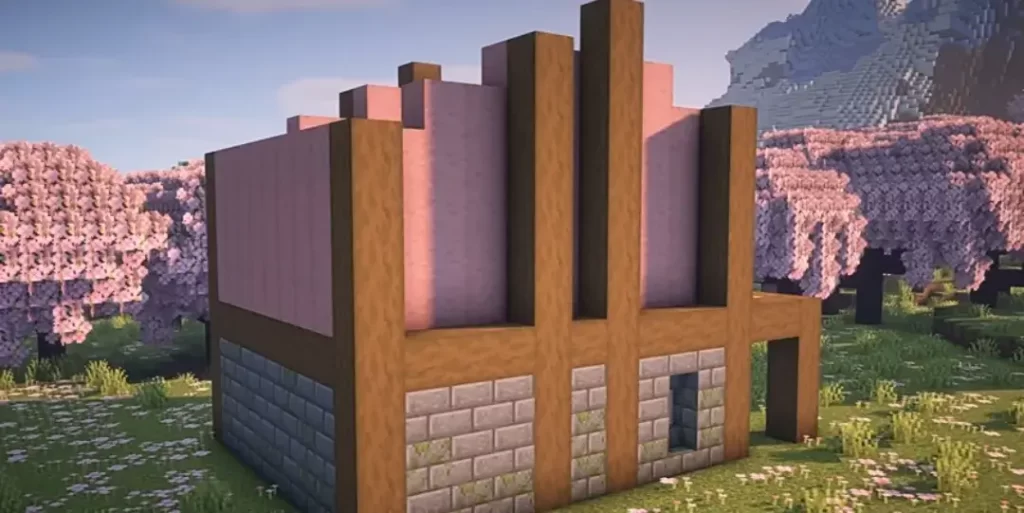
Step 2: Build Columns
Once done with foundation, build the structure of your house. Start building the columns with oak logs. After that connect all the columns.
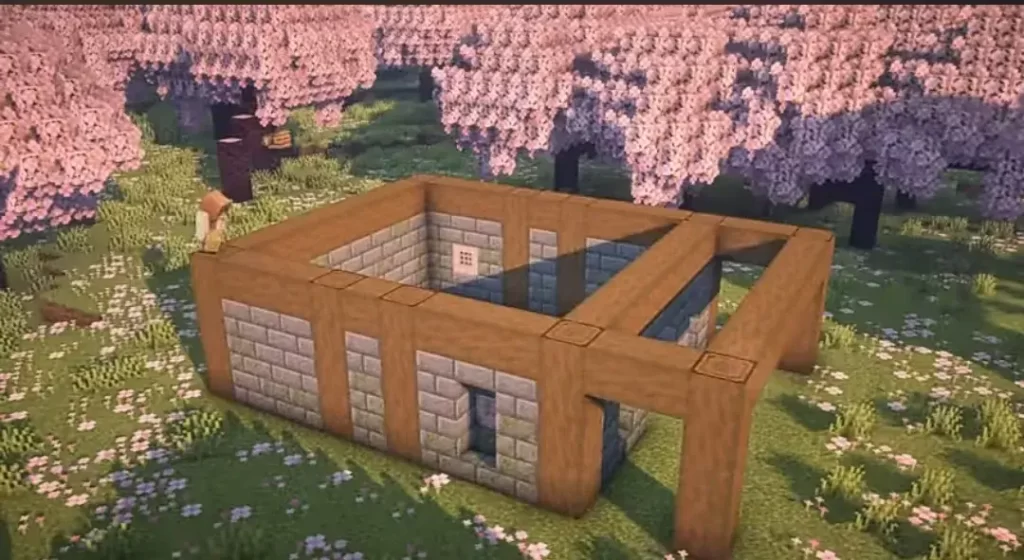
Step 3: Build Walls
Now build walls of your house using stone bricks leaving space for windows and doors.
Step 4: Build Floor
In the fourth step, build the floor of your house. Be sure it is the floor of the 2nd story using planks and the roof of the balcony area with slabs.

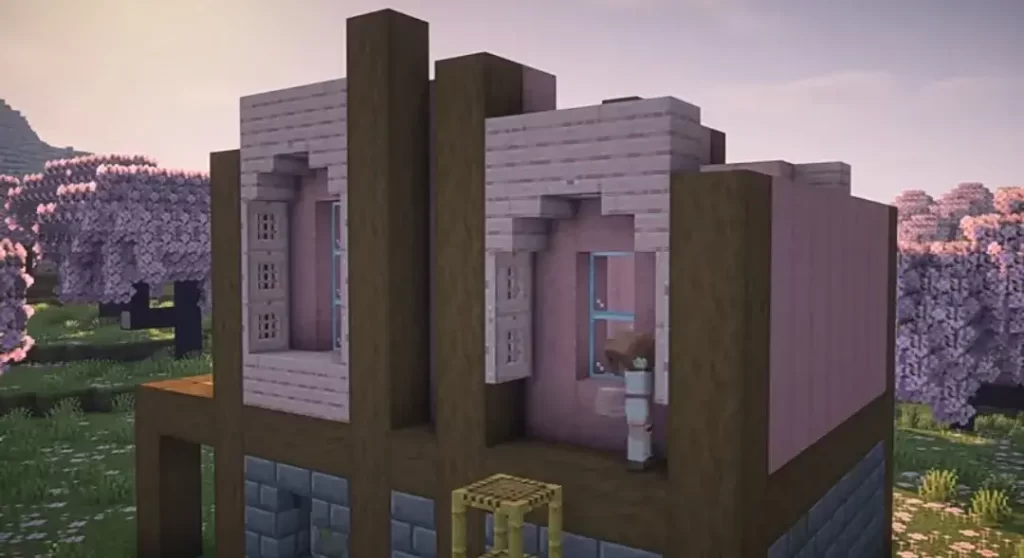
Step 5: Build Top Columns
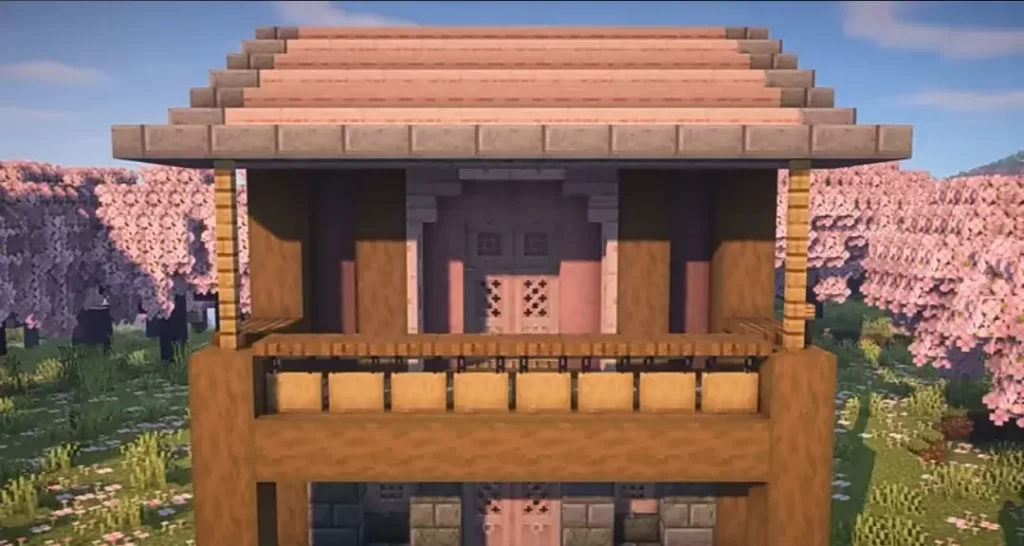
Now build the top columns of the House up 4,6,7 and blocks up. Then build walls with cherry log.
Step 6: Add Door and Windows
After building the top entrance, add trap doors and windows to your house.
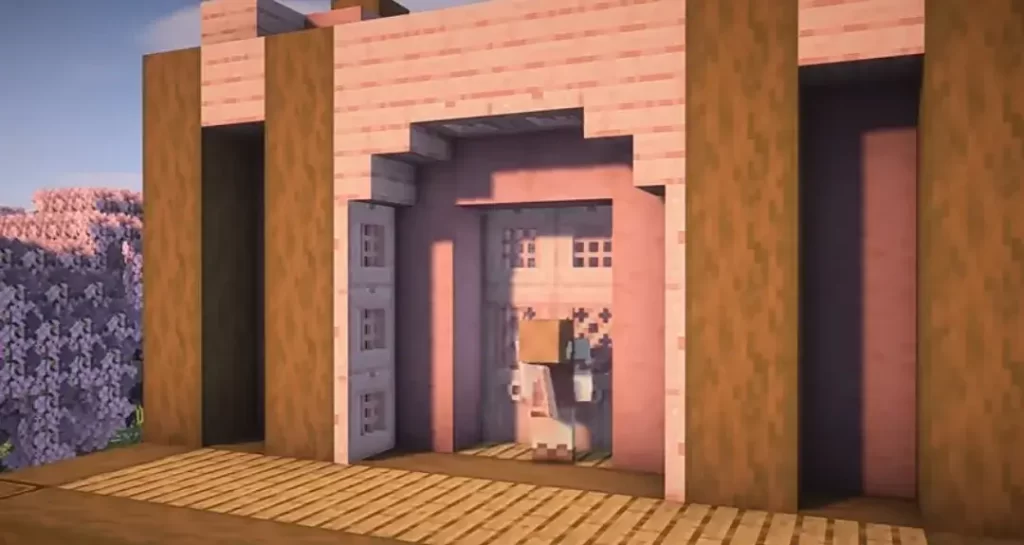
Use glass panes as windows.
Step 7: Build Roof
In this step, build a roof of your house. Begin from the edges. Cover the balcony part too.
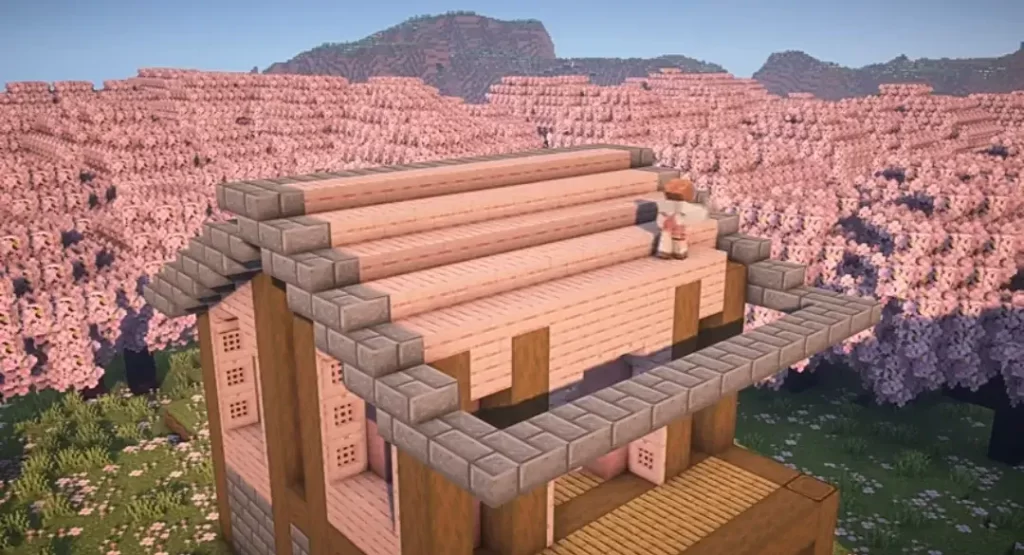
Step 8: Build Balcony
Build a balcony of your cherry house and add a fence.
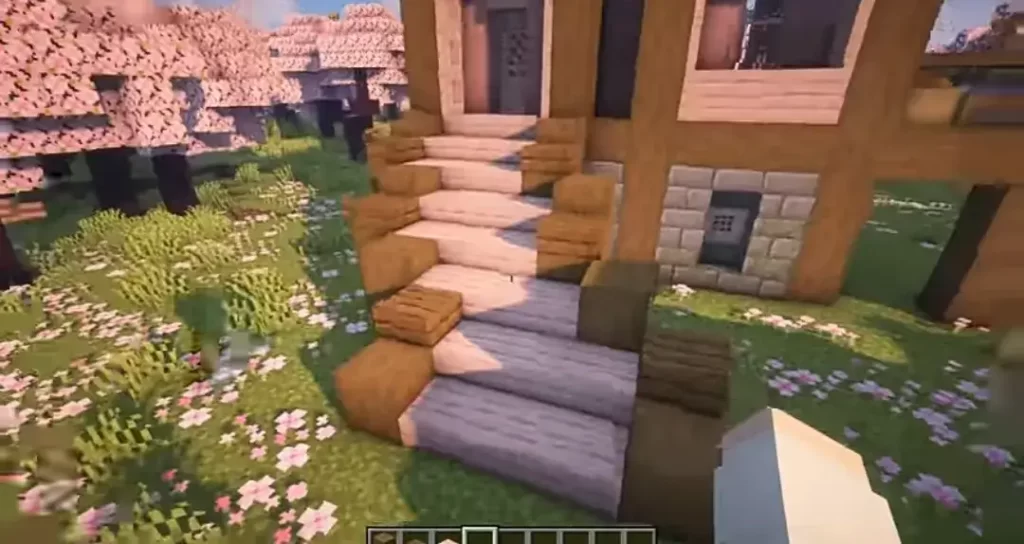
Step 9: Build Staircase
Now build a staircase using stripped wood and spruce slab and cherry slab.
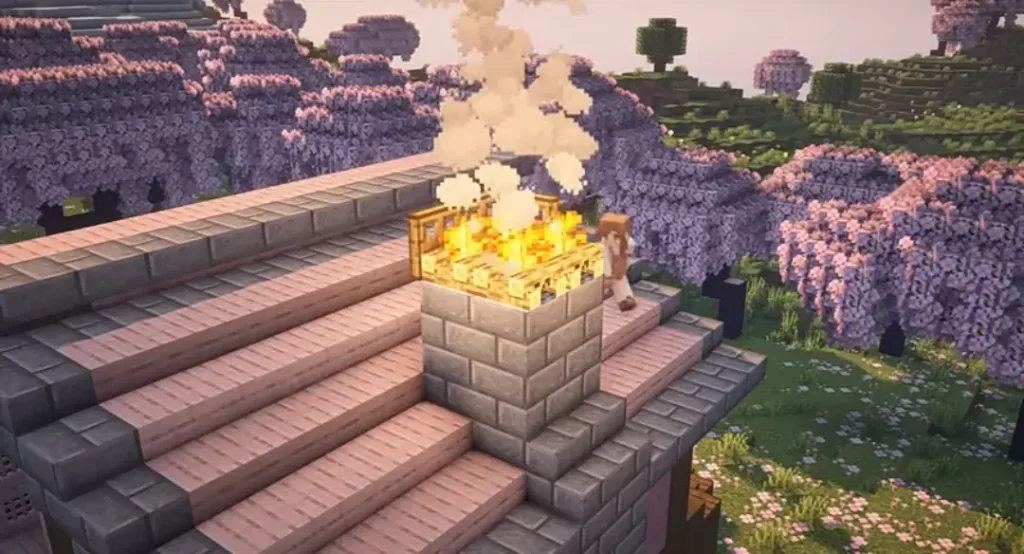
Step 10: Build Chimney
Once done with the staircase, build a chimney for your house using stone blocks, campfire and trapdoors.
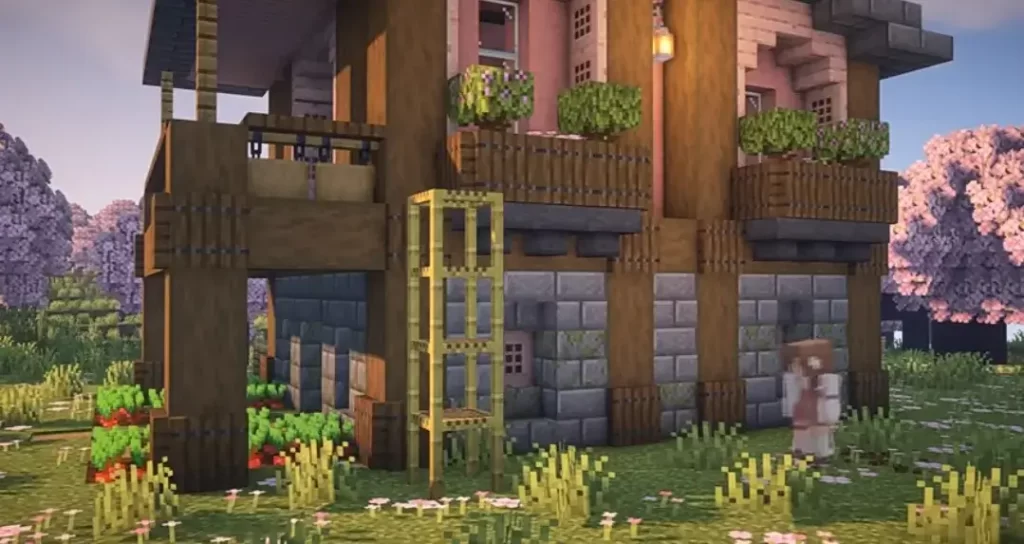
Step 11: Add Decorations
Now add decorations and details to your cherry blossom house using oak leaves, chain, lanterns, flowers, seeds and fences.
Closing Words
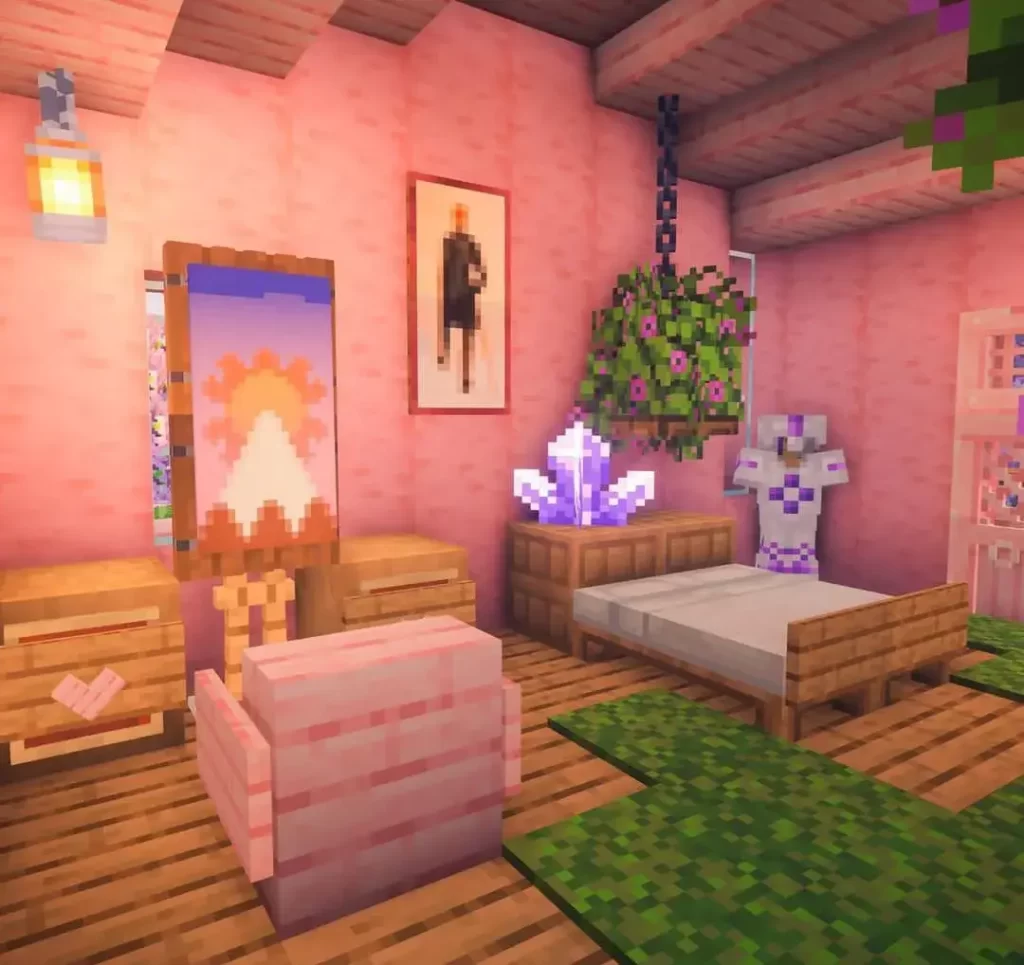
Finally, to conclude the steps of building an aesthetic cherry blossom house, we can say that decorations make the house beautiful inside and out. So for interior design, you can add furniture and other decorations according to your personal preferences for example bed, bookshelf, paintings or armor stand.